Accelerate your documentation workflow: Generate docs for whole folders at once
At Lunar, most of our dbt models are sourcing from event-driven architecture. As an example, we have the following models for our activity_based_interest folder in our ingestion layer:
activity_based_interest_activated.sqlactivity_based_interest_deactivated.sqlactivity_based_interest_updated.sqldowngrade_interest_level_for_user.sqlset_inactive_interest_rate_after_july_1st_in_bec_for_user.sqlset_inactive_interest_rate_from_july_1st_in_bec_for_user.sqlset_interest_levels_from_june_1st_in_bec_for_user.sql
This results in a lot of the same columns (e.g. account_id) existing in different models, across different layers. This means I end up:
- Writing/copy-pasting the same documentation over and over again
- Halfway through, realizing I could improve the wording to make it easier to understand, and go back and update the
.ymlfiles I already did - Realizing I made a syntax error in my
.ymlfile, so I go back and fix it - Realizing the columns are defined differently with different wording being used in other folders in our dbt project
- Reconsidering my choice of career and pray that a large language model will steal my job
- Considering if there’s a better way to be generating documentation used across different models
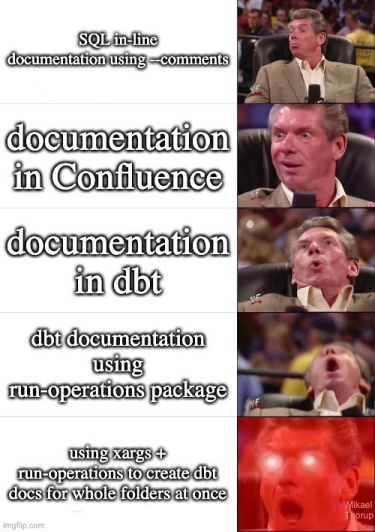
In fact, I found a better way using some CLI commands, the dbt Codegen package and docs blocks. I also made the following meme in the dbt Community Slack channel #memes-and-off-topic-chatter to encapsulate this method:
What pain is being solved?
If you need to document the same column multiple times, this method limits manual errors, makes it faster to write and maintain documentation, and improves consistency of documentation. This documentation method saves me 50-80% of the time I previously spent on documentation, by making the documentation process in dbt more DRY and automated.
What will you learn after reading this article?
Not only will you learn how to work in an easier way with dbt documentation, but you will also become more familiar with the dbt Codegen package, docs blocks, regex, and terminal commands.
Note that this solution has been tested on Mac/VS Code, and that regex behavior may vary between stacks.
Prerequisites
- Experience writing dbt documentation manually
- Installing dbt, the dbt Codegen package, and VS Code
- A folder in your dbt project which has a lot of undocumented dbt models, where a lot of column names overlap between the models
Case study
In this article, we’ll use a current task of mine, where I mapped the following events related to interest rates:
models/core/activity_based_interest
├── events
│   ├── activity_based_interest_activated.sql
│   ├── activity_based_interest_deactivated.sql
│   ├── activity_based_interest_updated.sql
│   ├── downgrade_interest_level_for_user.sql
│   ├── set_inactive_interest_rate_after_july_1st_in_bec_for_user.sql
│   ├── set_inactive_interest_rate_from_july_1st_in_bec_for_user.sql
│   └── set_interest_levels_from_june_1st_in_bec_for_user.sql
└── models
    └── f_activity_based_interest.sql
Generate .yml with Codegen package
The dbt Codegen package generates dbt code and logs it to the command line, so you can copy and paste it to use in your dbt project. Rather than writing the content of .yml files manually, you can use the generate_model_yaml macro, which queries the database to gather table — and column names, and outputs this into a format ready to be copy-pasted into a .yml file.
This macro allows you to run commands like:
dbt run-operation generate_model_yaml --args '{"model_names": ["your_model_name",], "upstream_descriptions": true}'
The arguments are, as per Codegen’s documentation:
model_names(required): The model(s) you wish to generate YAML for.upstream_descriptions(optional,default=False): Whether you want to include descriptions for identical column names from upstream models.
This macro generates the YAML for a list of model(s), which you can then paste into a schema.yml file, for instance:
$ dbt run-operation generate_model_yaml --args '{"model_names": [ "activity_based_interest_activated"] }'
outputs:
13:09:42  Running with dbt=1.3.1
13:09:45  version: 2

models:
  - name: activity_based_interest_activated
    description: ""
    columns:
      - name: id
        description: ""

      - name: user_id
        description: ""

      - name: start_date
        description: ""

      - name: end_date
        description: ""

      - name: tier_threshold_amount
        description: ""

      - name: tier_interest_percentage
        description: ""

      - name: event_time
        description: ""

      - name: event_day
        description: ""
Everything from version: 2 and onwards can be copy-pasted into your .yml file, and just like that, you’ve saved a lot of time having to write structure by hand (and inevitably forgetting a ", a ', or making some random indentation error somewhere…).
Generate .yml for several models at once
For the astute observer, model_names accepts several models, which we can take advantage of. Thus, we don’t need to run this tool once per model. Instead, we can run:
$ dbt run-operation generate_model_yaml --args '{"model_names": [ "activity_based_interest_activated", "activity_based_interest_deactivated", "activity_based_interest_updated", "downgrade_interest_level_for_user", "f_activity_based_interest", "set_inactive_interest_rate_after_july_1st_in_bec_for_user", "set_inactive_interest_rate_from_july_1st_in_bec_for_user", "set_interest_levels_from_june_1st_in_bec_for_user"] }'
This returns a single .yml file, containing documentation for all of the models, similarly to above. Here’s a subset of the result set:
13:16:21  Running with dbt=1.3.1
13:16:27  version: 2

models:
  - name: activity_based_interest_activated
    description: ""
    columns:
      - name: id
        description: ""

      - name: user_id
        description: ""

... (truncated for example purposes)

  - name: set_inactive_interest_rate_after_july_1st_in_bec_for_user
    description: ""
    columns:
      - name: id
        description: ""

      - name: user_id
        description: ""

      - name: start_date
        description: ""

      - name: event_time
        description: ""

      - name: event_day
        description: ""

  - name: set_inactive_interest_rate_from_july_1st_in_bec_for_user
    description: ""
    columns:
      - name: id
        description: ""

      - name: user_id
        description: ""

      - name: event_time
        description: ""

      - name: event_day
        description: ""
Get model names programmatically
In order to not have to manually write all of the model names, we can programmatically gather names of relevant models:
$ dbt ls -m models/core/activity_based_interest --output name | xargs -I{} echo -n ' "{}",'
 "activity_based_interest_activated", "activity_based_interest_deactivated", "activity_based_interest_updated", "downgrade_interest_level_for_user", "f_activity_based_interest", "set_inactive_interest_rate_after_july_1st_in_bec_for_user", "set_inactive_interest_rate_from_july_1st_in_bec_for_user", "set_interest_levels_from_june_1st_in_bec_for_user",%
dbt ls -m models/core/activity_based_interest: This command lists all dbt models in the models/core/activity_based_interest directory.--output name: This option filters the output to only show the name of each model, rather than the context + model name.| xargs -I{} echo -n ' "{}",': This pipe sends the output of the previous command toxargs, which runs the echo command on each line of output.-I{}specifies that{}should be replaced with the model name- The
echocommand then formats the model name by wrapping it in double quotes and appending a comma and a space:"model", "name", - The
-noption forechoremoves the trailing newline
The output (⚠️ except the last two characters ,% ) can then be copy-pasted into the following:
dbt run-operation generate_model_yaml --args '{"model_names": [ReplaceWithYourOutputFromPreviousCommand]}'
Which in turn can be copy-pasted into a new .yml file. In our example, we write it to _activity_based_interest.yml.
Create docs blocks for the new columns
Docs blocks can be utilized to write more DRY and robust documentation. To use docs blocks, update your folder structure to contain a .md file. Your file structure should now look like this:
models/core/activity_based_interest
├── _activity_based_interest_docs.md --New docs block markdown file
├── _activity_based_interest_docs.yml
├── events
│   ├── activity_based_interest_activated.sql
│   ├── activity_based_interest_deactivated.sql
│   ├── activity_based_interest_updated.sql
│   ├── downgrade_interest_level_for_user.sql
│   ├── set_inactive_interest_rate_after_july_1st_in_bec_for_user.sql
│   ├── set_inactive_interest_rate_from_july_1st_in_bec_for_user.sql
│   └── set_interest_levels_from_june_1st_in_bec_for_user.sql
└── models
    └── f_activity_based_interest.sql
$ cat models/core/activity_based_interest/_activity_based_interest_docs.md
{% docs activity_based_interest__id %}

Primary key of the table. See sql for key definition.

{% enddocs %}

{% docs activity_based_interest__user_id %}

The internal company id for a given user.

{% enddocs %}
$ cat models/core/activity_based_interest/_activity_based_interest_docs.yml
version: 2

models:
  - name: activity_based_interest_activated
    description: ""
    columns:
      - name: id
        description: "{{ doc('activity_based_interest__id') }}"

      - name: user_id
        description: "{{ doc('activity_based_interest__user_id') }}"

... (truncated for example purposes)

  - name: set_inactive_interest_rate_after_july_1st_in_bec_for_user
    description: ""
    columns:
      - name: id
        description: "{{ doc('activity_based_interest__id') }}"

      - name: user_id
        description: "{{ doc('activity_based_interest__user_id') }}"
To confirm the formatting works, run the following command to get dbt Docs up and running:
$ dbt docs && dbt docs serve
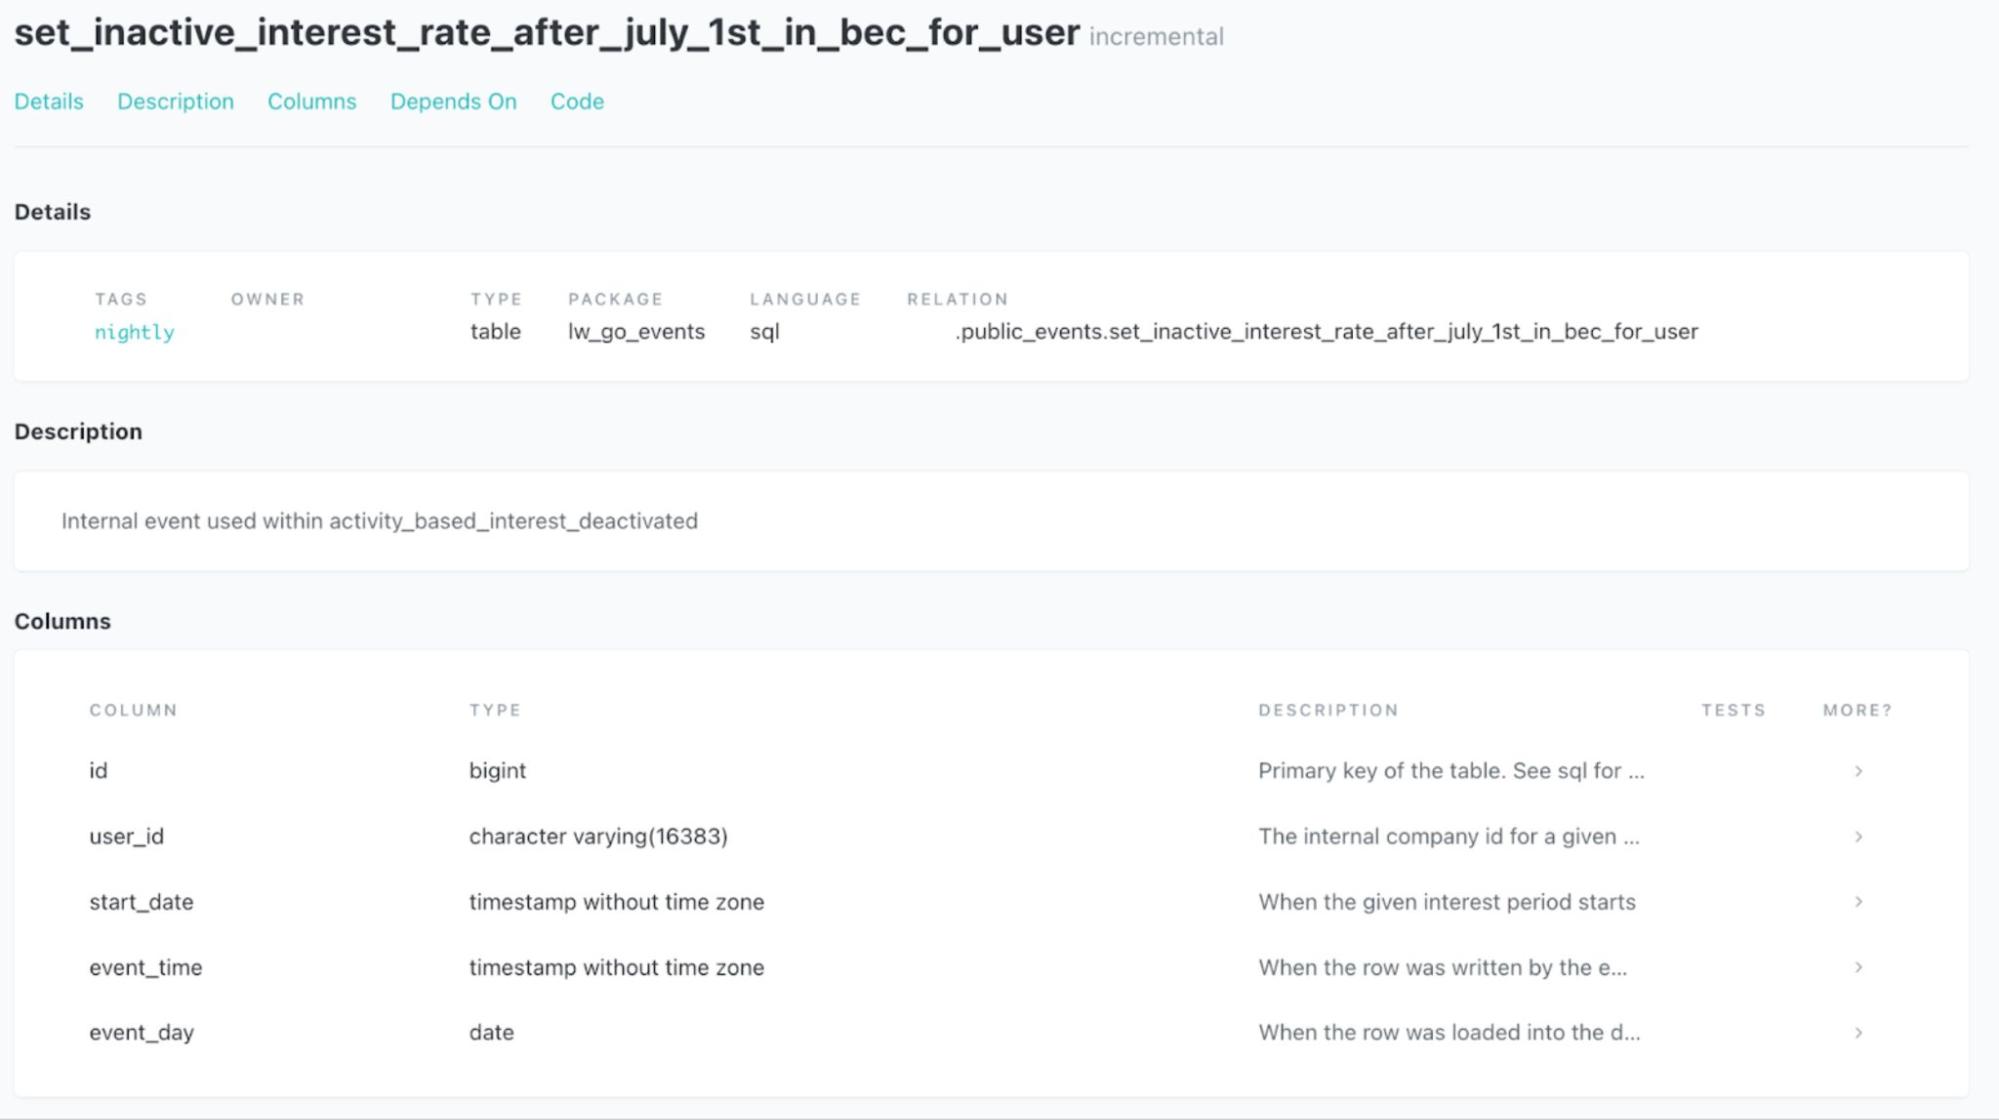
Here, you can confirm that the column descriptions using the doc blocks are working as intended.
Get all unique columns within the folder
To cut down on copy-pasting between your markdown and YAML files, find all of the unique columns in the folder and subfolders, by running the following command:
$ grep '      \- name:' models/core/activity_based_interest/_activity_based_interest_docs.yml | cut -c 15- | sort -u
end_date
event_day
event_time
id
is_active
last_updated_date
start_date
tier_interest_percentage
tier_threshold_amount
user_id
Breaking down this command:
grep ' \- name:' models/core/activity_based_interest/_activity_based_interest_docs.ymlsearches for the pattern- name:in the file_activity_based_interest_docs.ymllocated in the directorymodels/core/activity_based_interest/.cut -c 15-cuts the first 14 characters of each line from the output, i.e. in .yml files, we cut- name:from- name: some_column_name, so you are left with onlysome_column_name.sort -usorts the output in alphabetical order and removes any duplicate lines.
Format to align with Jinja docs block
Copy-paste the above output into your .md file, so it looks like the following:
$ cat models/core/activity_based_interest/_activity_based_interest_docs.md
end_date
event_day
event_time
id
is_active
last_updated_date
start_date
tier_interest_percentage
tier_threshold_amount
user_id
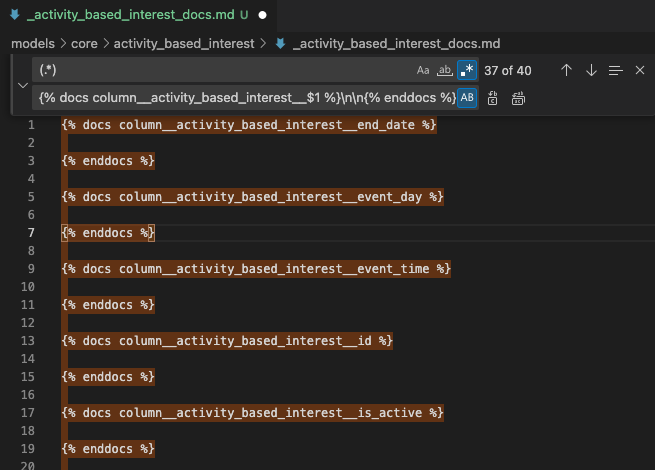
Now, open your code editor, and replace (.*) with {% docs column__activity_based_interest__$1 %}\n\n{% enddocs %}\n, which will result in the following in your markdown file:
Now you can add documentation to each of your columns.
Update .yml file to source documentation from the .md file
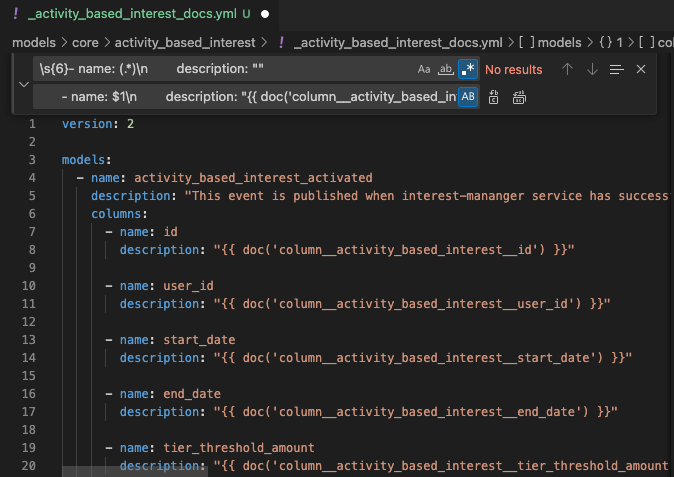
You can programmatically identify all columns, and have them point towards the newly-created documentation. In your code editor, replace \s{6}- name: (.*)\n description: "" with - name: $1\n description: "{{ doc('column__activity_based_interest__$1') }}:
⚠️ Some of your columns may already be available in existing docs blocks. In this example, the following replacements are done:
{{ doc('column__activity_based_interest__user_id') }}→{{ doc("column_user_id") }}{{ doc('column__activity_based_interest__event_day') }}→{{ doc("column_event_day") }}
Check that everything works
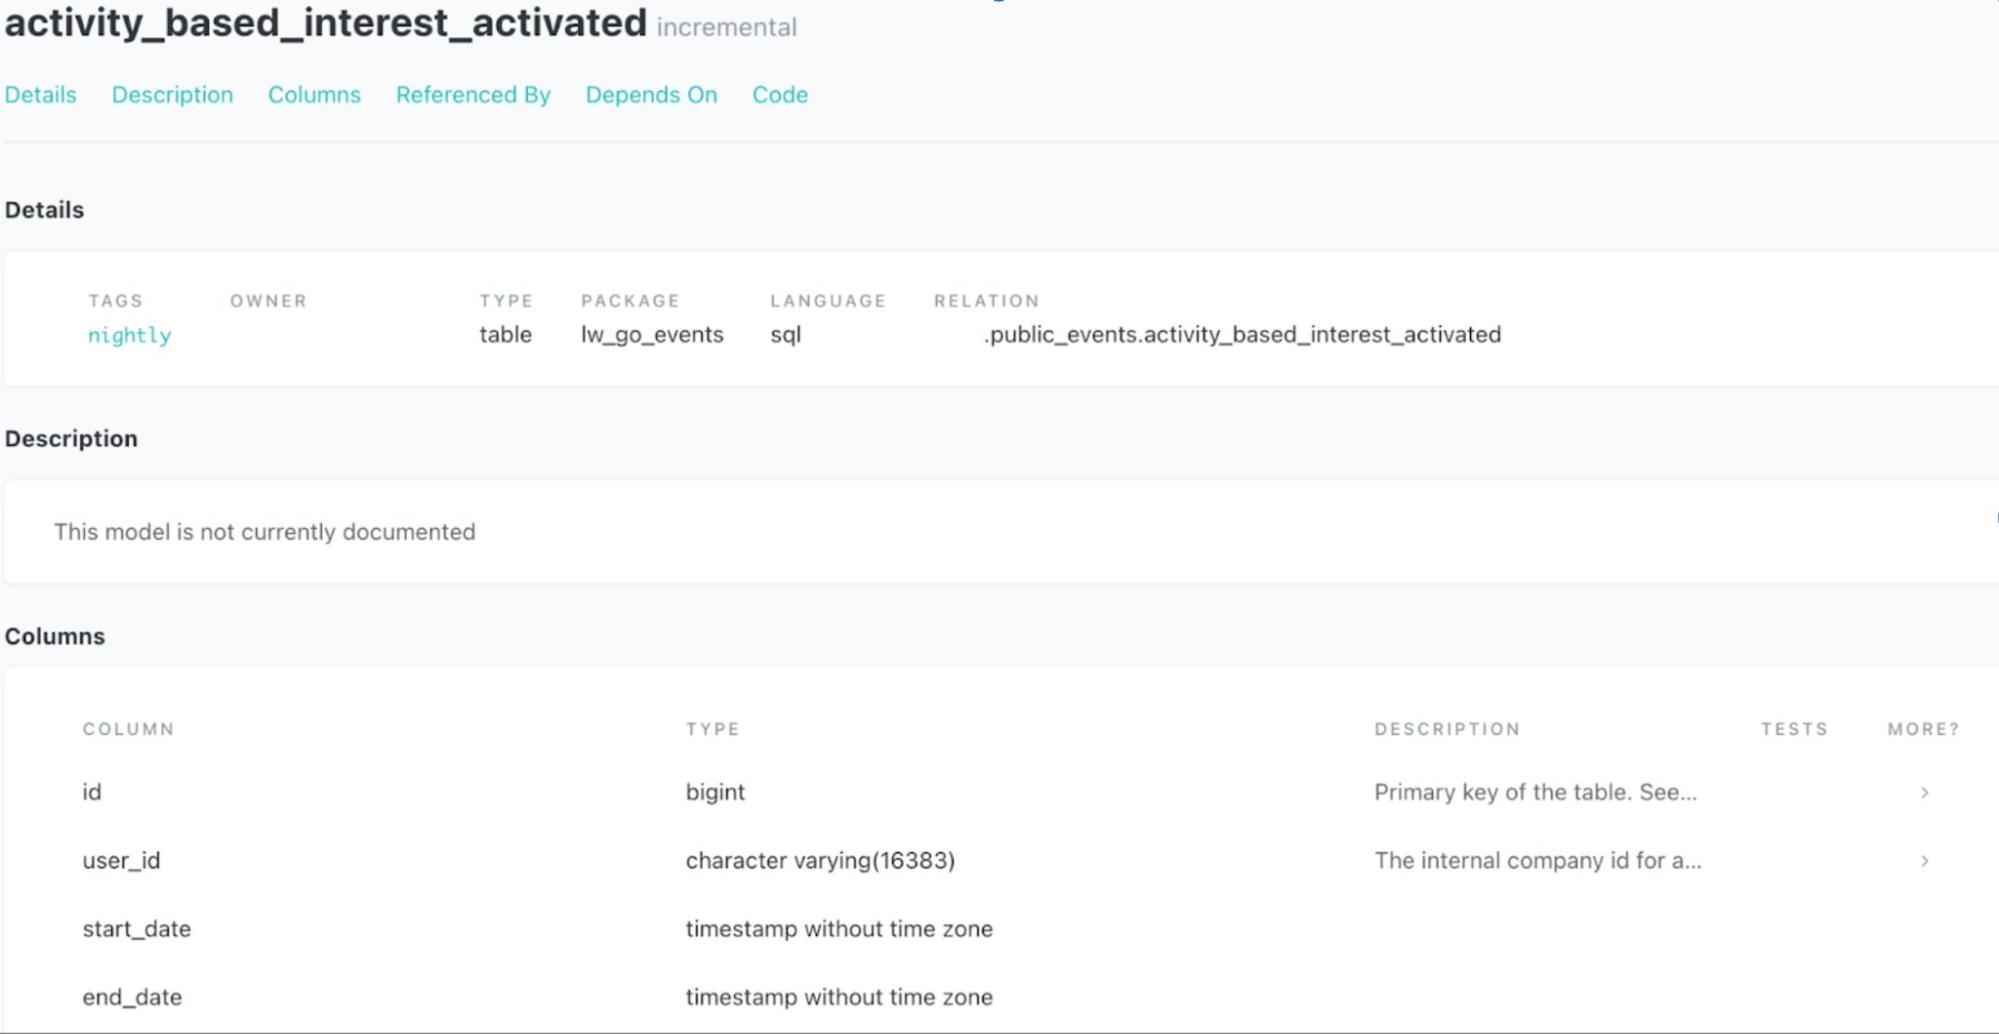
Run dbt docs generate. If there are syntax errors, this will be found out at this stage. If successful, we can run dbt docs serve to perform a smoke test and ensure everything looks right:
Additional considerations
-
Q: What about when they are slight deviations in column documentation between models?
- A: I’ve been using dynamic documentation to contain the "essence" of the documentation, and then appending static documentation, like so:
       - name: user_id
description: "{{ doc('dynamic_docs') }}, additional static info" -
Q: Should I use this approach on modifications to an existing folder?
- A: When adding additional models to a folder, or additional columns to an existing model, I would suggest adding new documentation and docs blocks manually rather than programmatically.
-
Q: Couldn’t this be made into a shell script?
- A: Yes! The solution above works well enough for me, but if you make a script, do let me know, as that would make this even easier to use.

Comments